AI Patfinding In Unity3d
by Toys of Hendrik
Basicly, patfinding is a thing or maybe you can call it your enemy (in case you’re the player) which can following you wherever you go and avoiding the obstacle till they catch you like this picture which I get on the wikipedia.
You’re B and the enemy is A and that’s a simple explanation about pathfinding or you can find more here, the biggest library in this unseen world. Next, if you’re not already install unity just find it here. If yes, I think we are ready to face the future. Inside the unity, we can following the step like below.
- Setting up the project
- Create the environment and obstacle
- Bake the environment and obstacle
- Create player and enemy object and add nav mesh agent into the enemy object
- Just taste the script
- Hit the play button
Okay, so how about we follow the step one by one.
1. Setting Up The Project
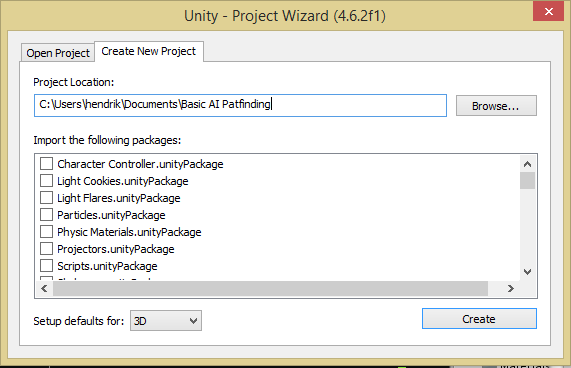
Firstly on unity you’re gonna see the splash screen and after that you use your existing project or maybe you should create a new project by clicking “Create New Project” tab, set the location and give a beaut name folder. I use Unity 4.6.2 version.
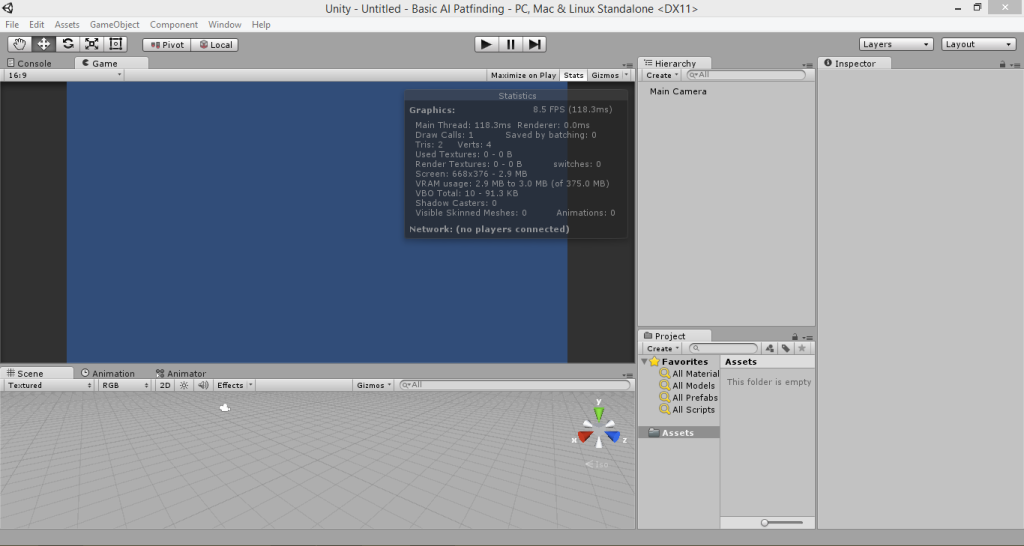
I name it “Basic AI Patfinding”, whatever if you check or uncheck the following packages like character controller, light cookies. like flares, etc. And hit create so you can watch the blank space which is minorited by blue like below.
Let’s make the environment and obstacle.
2. Create The Environment and Obstacle
After facing the empty project screen we can create a floor by a cube with clicking GameObject -> 3D Object – Cube and you will see the cube in the middle of the blue. Scale and edit the position until flat enough like a floor or you can follow the position, rotation and scale parameter like this and rename the ‘cube’ with ‘floor’.
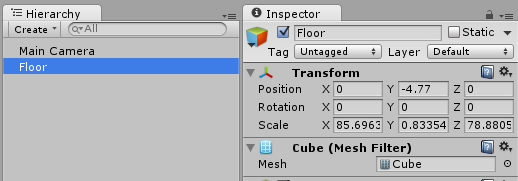
Floor parameter
If you don’t want to see the darkness side you can add a directional light by clicking GameObject -> Light -> Directional Light. Next step is build the obstacle. You can add cube, sphere, or capsule by GameObject -> 3D Object -> Choose what you want. Set it with your inner imagination and this is mine.
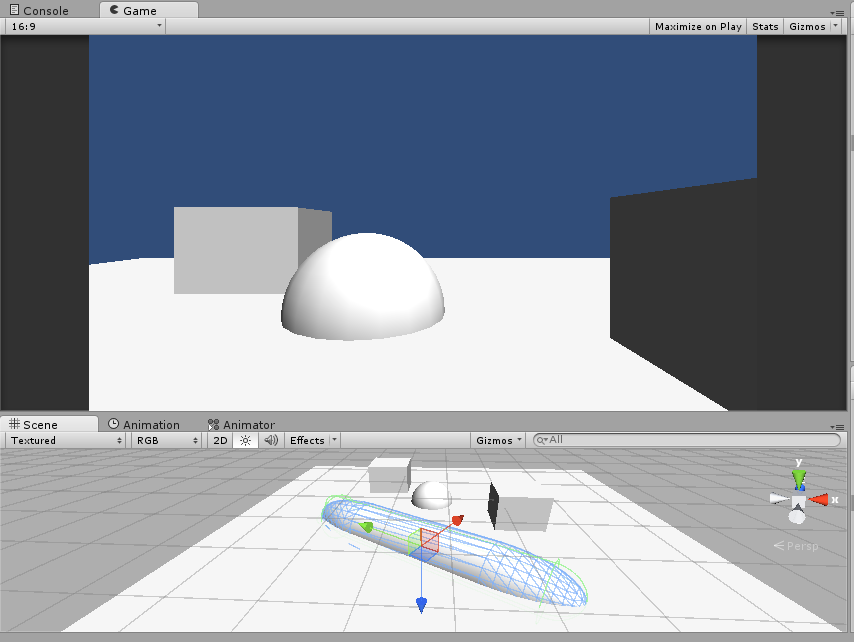
My obstacle looks like.
I know that’s wierd but we just need the point, right ?
hehe. So we already made the obstacle and we see the hierarchy like this.
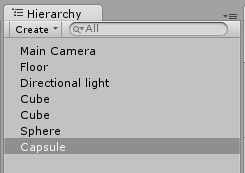
Parent
We should move the obstacles which like cube, cube, sphere, capsule above inside the Floor object. So we just move cube, cube, sphere, capsule as a child of Floor and Floor is a parent of them.
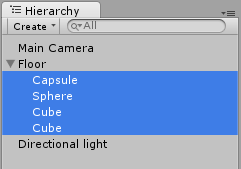
Parent and child
Select the Floor object and we’re going to bake it all !!!
3. Bake Environment and Obstacle
Don’t forget to select the Floor object and we need a navigation panel which can found in Window -> Navigation and here’s the look of Navigation Panel and check the navigation static, if the pop up shown, click “Yes, change the children”.
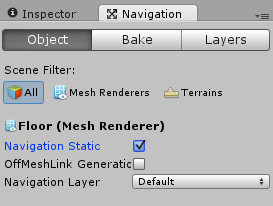
Navigation Panel
See the “Bake” button on the down right after “Clear” button ? if yes, click the “Bake” button and the exporting tiles process will working. If it’s finish yet, the scene view should be like this if your “Show NavMesh” checked.
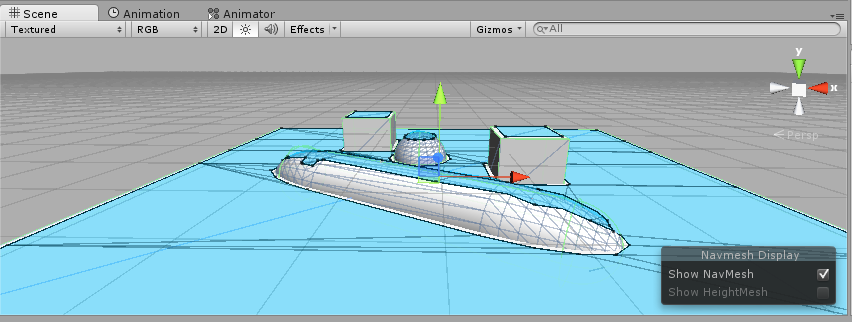
NavMesh Checked.
That blue area is a exported tiles mesh that we bake before, and we’re gonna set the player and the enemy object.
4. Player and Enemy Objects
Ok, It just a testing so we don’t need a detailed character which can represent player and enemy. We can use two cubes for that. So create a two cubes and make sure the place of two of them far away. Rename the two “cube” to “Player” and “Enemy”.
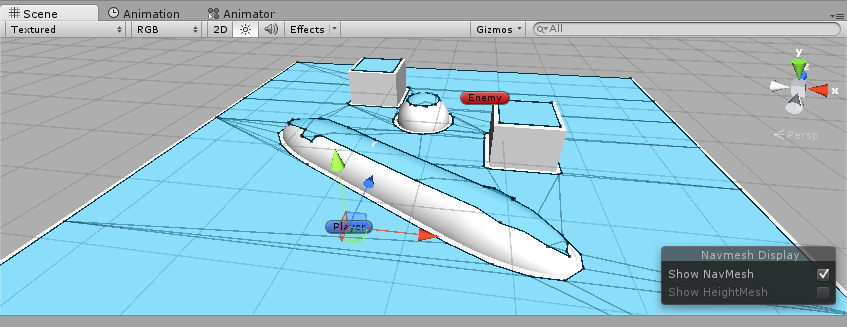
Player and Enemy
Add a rigidbody component into the player and enemy if you want them has a gravity. On the Player object, you see the tag on top of the inspector is Untagged, change it to Player.
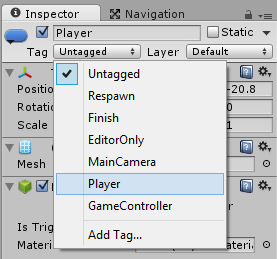
Player Tag
On the Enemy object, add the NavMesh Agent component by clicking Add Component -> type “Nav Nesh Agent” and click it.
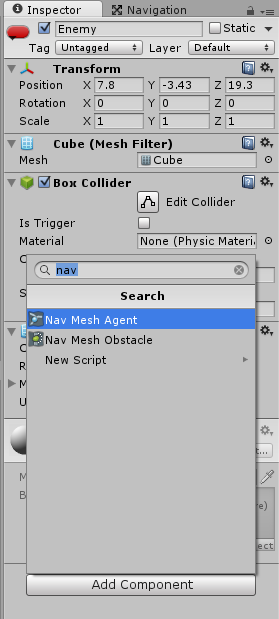
Nav Mesh Agent
5. Woah, Loot At That Script !!
So are you ready for the script yet ? In the Project panel, you’ll see the “Create” button, click it and select C# Script, name it with EnemyAI. Open and edit the script.
1 2 3 4 5 6 7 8 9 10 11 12 13 14 15 16 17 18 | using UnityEngine; using System.Collections; public class EnemyAI : MonoBehaviour { NavMeshAgent nav; Transform player; // Use this for initialization void Awake () { nav = GetComponent<NavMeshAgent>(); player = GameObject.FindGameObjectWithTag("Player").transform; } // Update is called once per frame void Update () { nav.SetDestination(player.position); } } |
Ok, I will explain
- We need two objects of the class, nav and player
- nav is an object that we can get inside the Enemy object (we add nav mesh agent last time)
- player is an object that we can get from another object named Player and have a “Player” tag
- Generally after we made a script, the default method is Start and Update, we use Awake method to call the nav mesh component from Enemy object and Player object to player.
- The last method is Update and inside it we find the built-in class of Nav Mesh Agent, Set Destination. We write that command and the enemy will follow the player position by itself.
And attach that script in the Enemy object. You can edit the Speed, Acceleration, Radius parameters on Nav Mesh Agent Component.
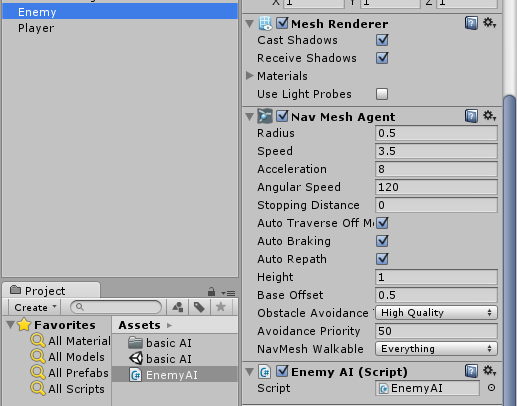
Attach the script
6. Hit Play, and Let See What Happen
So when you press play button, the enemy will move and find the player. It should be if you follow the steps above. That’s it. If you find something wrong about this tutorial please comment and I will fix it and I’m sorry if my english so bad.

